Wednesday, 30 April 2014

Spider Plants and Filler Beads

A fair few years ago, I was given a spider plant by my primary school teacher. My whole class was given a baby spider plant with the instruction to name them and look after them. I have no idea why but I decided to name mine Holly. Holly the spider plant has sat on my windowsill ever since and she is still alive today. I'd done such a good job keeping Holly alive that after a few years, there were little plants sprouting out from the root! I was so pleased with myself for growing these baby plants but I never planted them. As the old ones died, new ones would replace them (until my cat decided to eat a few) and it wasn't until about a week ago that I decided to repot one.


Because I was planning to put my baby plant inside, I ordered some transparent vase filler beads from Amazon UK. I decided on these beads instead of soil because I think they make the plant look very elegant and clean and makes it easier to look after. When my beads arrived I was slightly concerned but the size but after soaking them in water for 6-8 hours they had grown to way over 5x the size. Once my beads had grown, I put some into a tea light holder from Tiger and stuck my baby spider plant into the pot to absorb all the water from the beads and grow!

I am fully aware that this can't really be classified as a "make" because all I did was soak some vase filler beads in water and place them in a glass but I was very happy with how my plant looked and wanted to share it with you. If you've used vase filler beads in the past or decide you're going to start, feel free to post a picture to Instagram and tag me (@naomismakes) so I can see them!

Tuesday, 22 April 2014

Fishtail Bracelets

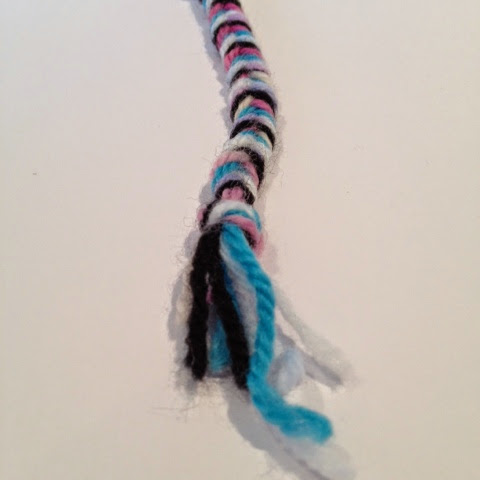
I love doing a fishtail braid in my hair and it's actually really simple! You can make a sweet bracelet using this plait that you could give to a friend or keep for yourself!


So first, I got myself 5 strands (can be any number over 2) of wool all about 4-5 times the length of the ideal bracelet (remember, you can always cut it if it's too long!) and folded them in half. I then tied a simple knot at the top so they wouldn't come undone.


Then you want to pick up a piece from the outer edge of the left hand side and wrap it over the other strands as shown. This piece will now be part of the right hand section.


After you've done this, you want to find the same colour on the other side and repeat.


Carry on like this doing alternate sides until you have reached your desired length and then tie another knot to secure the braid in place.


Perfect! And you're done!

If you have a go at making a fishtail bracelet don't forget to tag me (@naomismakes) in your instagram photos! I'd really love to see them!

Tuesday, 15 April 2014

Experience Tokens

One thing I love to give my family, as little extra presents, is a token for something I do that makes them smile.


My Mum really loves it when I give her a shoulder massage and so I decided I'd give her these lovely, hand made tokens! This could be a token for a home pamper evening, their favourite meal or something else you love doing with your friend or family member.  It makes for a really thoughtful gift that you can add to your main present for something a bit more personal. And, it's free!

Saturday, 12 April 2014

Marbleised Cupcakes

These cupcakes are really cute and super easy - defiantly a favourite of mine!

For 12 Cupcakes:

You will need...
100g self raising flour
100g caster sugar
100g margarine
1 egg
2 tablespoons of milk
1 tablespoon of coacoa powder
12 (+) cupcake cases
A cupcake tray

Method
1. Preheat the oven to 200oC or gas mark 6.
2. Place the cupcake cases in the cupcake tray.

3. Weigh the self raising flour, caster sugar and margarine into the mixing bowl.
4. Add the egg and mix. When your ingredients are starting to look mixed, add the milk and stir.
5. Split your mixture into two equal parts.

6. Add your coacoa powder to one half and mix thoroughly

7. Fill your cases with 1 small spoonful of batter from each bowl so that there are two colours in the case.

8. Use a scewer of the handle of your spoon (or anything you choose) to swirl your two colours together. This will greate the marble effect. 

9. Bake for 15-20 minutes until golden and leave to cool on a cooling rack.

As always, if you have a go at making these cupcakes, be sure to tag me in your photos on Instagram and Twitter! (@naomismakes) I'd love to see them!

I have no idea why the date of this post is not being displayed correctly but the correct date of this blog post is the 14th May 2014.


Monday, 7 April 2014

Bunny Bread Rolls

With Easter fast approaching, I thought it would be a good time to make some "Bunny Bread". I have used the following recipe but feel free to use your own (skip to step 5) if you would like.


Ingredients/Utensils 

500g strong plain bread flour

1 level tsp. salt

1 level tsp. caster sugar

25g margarine

2 level tsp. easy blend dried yeast

1/4 pint lukewarm water

1/4 pint milk

(Optional) poppy or sesame seeds

Kitchen scissors

Cling film (or tea towel)

Tooth Picks


Method

1. Preheat the oven to gas mark 8 (220oC) and grease baking tray.

2. Put the flour, salt and sugar into the mixing bowl and rub in the margarine.


3. Stir in the yeast and add the milk and water. Use your (washed) hands to mix until it forms a dough.


4. Knead on floured surface for around 5-10 minutes until the dough is smooth and like elastic.


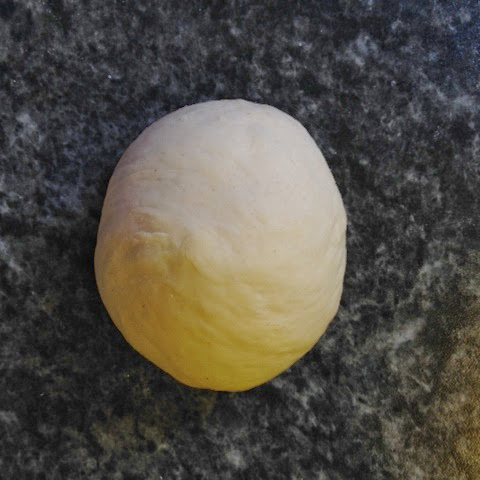
5. Divide your dough into around 11-13 evenly sized pieces. (I divided mine into 13 65g balls but I personally think it would look nicer to have smaller bunnies. Remember: the dough will rise to double the size!) You can use the scissors to do this.


6. Roll each section into a ball. (If for some reason, this is difficult, try kneeling the individual roll before shaping.


7. Use your scissors to snip the ears and a tooth pick to make holes for eyes.


8. (Optional) add a seed into each of the eye holes.

9. Put the rolls on a your tray and cover loosely with cling film or tea towel. Put them in a warm place to rise for around an hour.

10. Remove the cling film (or tea towel) and bake for 15-20 minutes until golden brown.


I really hope you enjoy making this! Feel free to tag me in your Instagram photos (@naomismakes) I'd love to see them!

instagram.com/naomismakes